
I usually write posts mainly focusing on cafe and afternoon tea nui-dori, as well as story and lore analysis, but I've decided to kick off a brand new category: "Merch Reviews."
Why write about merch? Honestly, I’ve always had a complete collector's mindset. I’m the type who buys almost every single piece of merch featuring my oshi and is perfectly satisfied just watching the collection grow.
But recently, ever since my awakening to the world of nui-dori, I've gradually started keeping decluttering (danshari) in mind. That shift inspired me to take a step back and objectively re-evaluate both my materialistic desires and the goods I actually bring home.
More than anything, I hope that for people who are panicking because a drop sold out, or those agonizing over whether they should make a purchase, this article can serve as a reference point to help you take a breath and make a calm decision...!
【※ ATTENTION ※】 The core purpose of this article is to verify "practicality." Therefore, this is not an unconditionally positive review claiming, "Every piece of official merch is a masterpiece! You must buy it all!"It might contain opinions that aren't suited for those who want to see their oshi's merch praised with zero reservations. I kindly ask for your understanding on that front, and hope you can simply enjoy this read as a bit of light entertainment!
The Despair of Only 10 Stores Nationwide: My Round One Collab Battle Record
The Round One collaboration was announced with barely a moment to catch our breath after the previous Star Live collab.
This time, the merch lineup primarily features the pre-bloomed 4-Star illustrations, and let me tell you, they are incredibly cute. Naturally, I instantly made the decision that these were an absolute "must-buy," but the problem was the number of participating locations.
Believe it or not, there were only 10 stores nationwide. It's an incomparably small number compared to the previous collab!
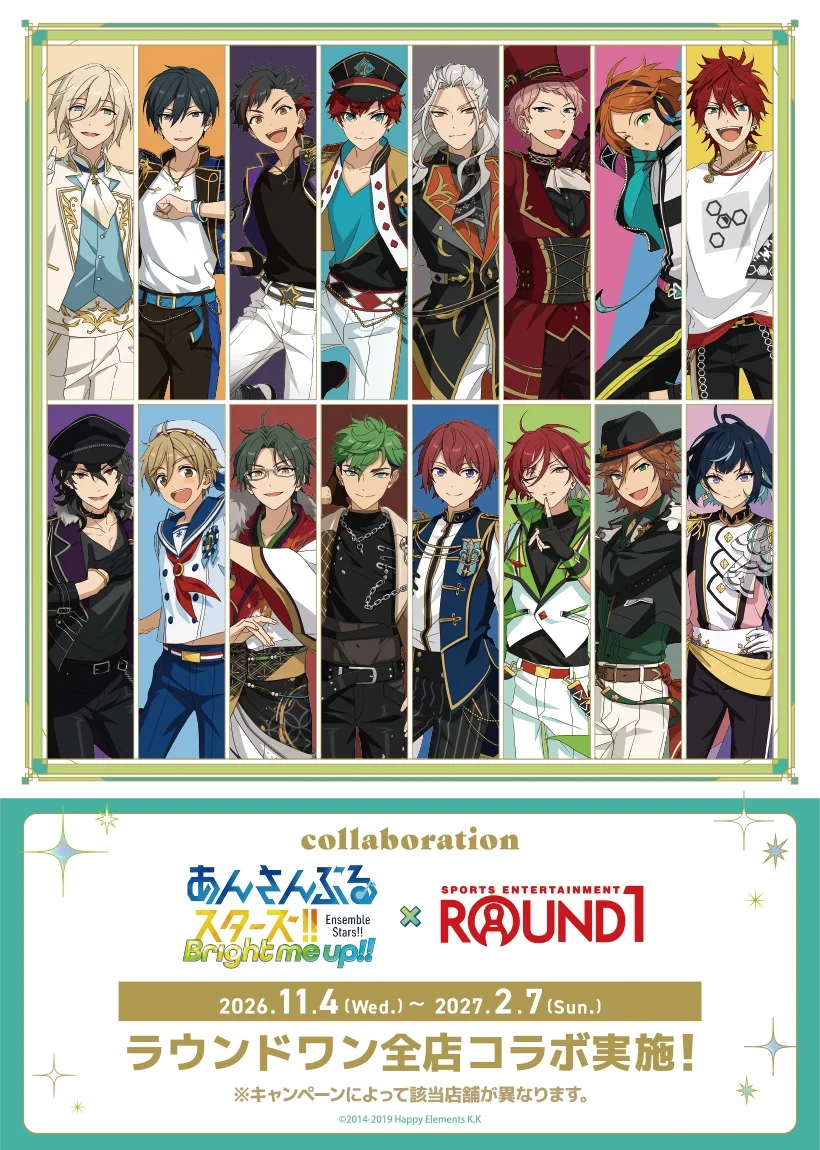
No matter how you looked at it, I could only realistically access about three stores from my house. Making the wrong choice here meant instant "game over."
Based on past experience, the golden rule of merch wars is to "cast a wide net in the densely packed city center." City center locations are more crowded, but they usually have abundant stock to match, and even in the worst-case scenario, you can quickly pivot to another nearby store. In contrast, suburban stores let you avoid the crowds, but the fatal flaw is their painfully small stock. However, this time around, the participating locations were perfectly scattered across the map, making store-hopping absolutely hopeless. I had no choice but to bet everything on a single location.
After much agonizing, I chose a suburban store. My reasoning? If management had deliberately narrowed the collab down to just 10 locations, I assumed each store must be well-versed in handling this franchise, possessing the right know-how for stock allocation and operations. Assuming that was true, I opted for the location with smaller crowds.

On the day of the release, the area around the venue was dead silent, like the "calm before the storm." I actually got a little paranoid, wondering, "Wait, does the collab actually start tomorrow...?" But remembering how abundant the stock was during the last event, deep down, I was feeling pretty overly confident. ...I was so naive.
There were fewer than 10 people lined up at the machines, and the situation was so relaxed that they weren't even issuing numbered tickets. However, the speed at which the open (non-blind) merch sold out was abnormally fast, completely incomparable to a typical Enstars drop. I checked social media to see how the other locations were doing, and it seemed the open merch was getting wiped out at a terrifying speed even at the city center stores.
Hands-On Review: I Bought Everything, But Please Everyone, Stay Calm
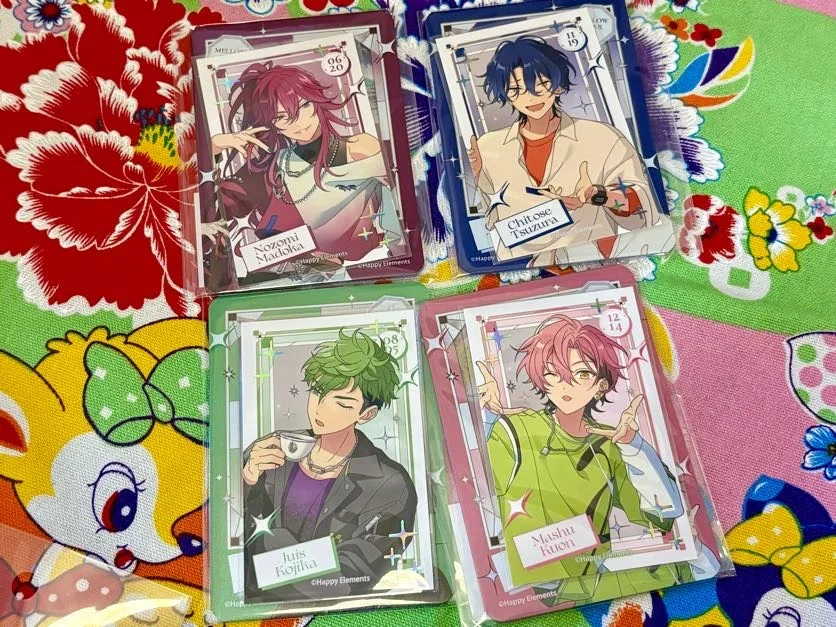
To put it plainly, I once again purchased every single item related to MELLOW DEAR US. (Note: Excluding a few keychains)
- Foil-Stamped Card Collection
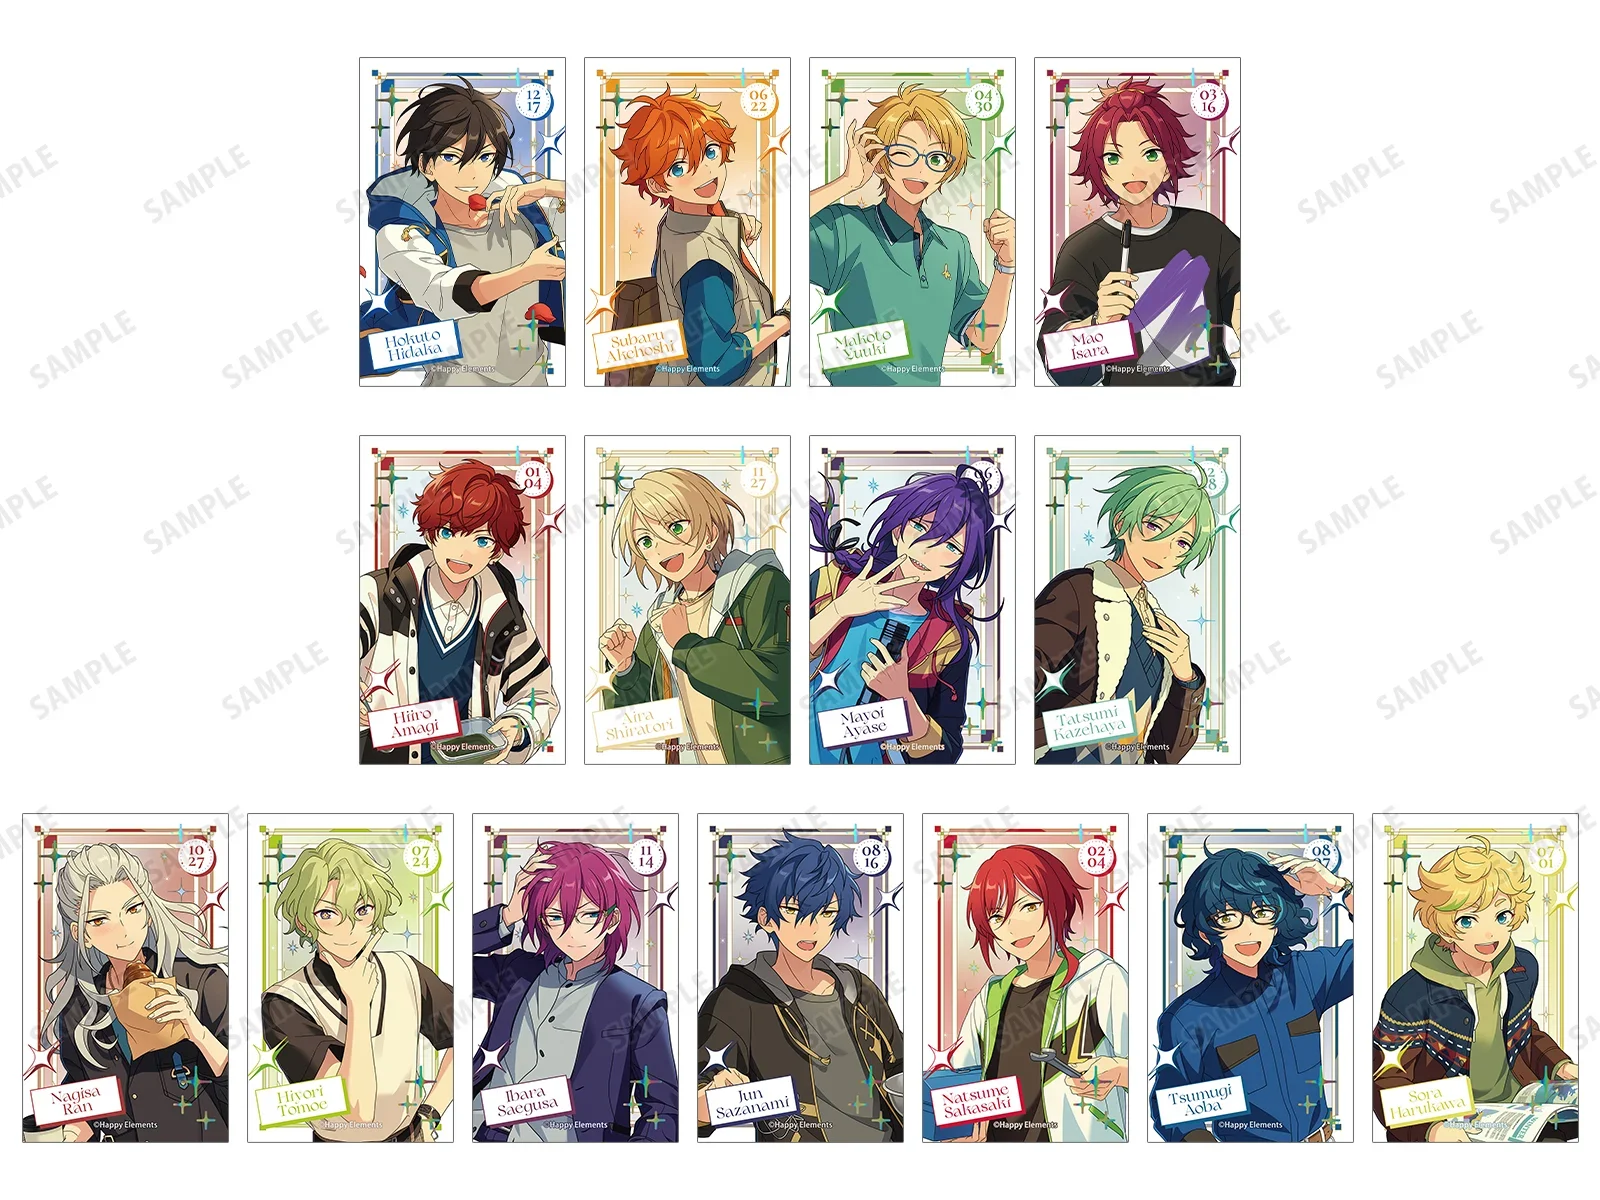
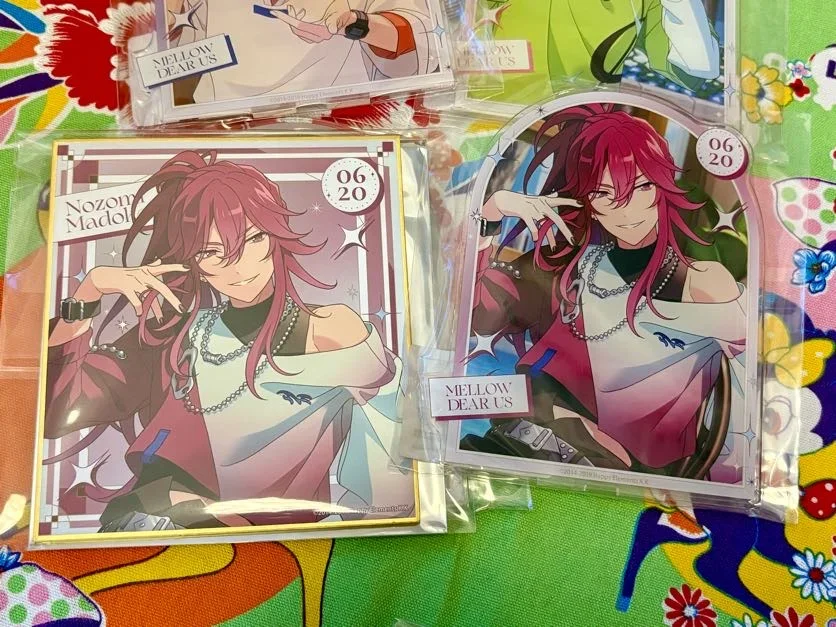
- Mini Shikishi Collection
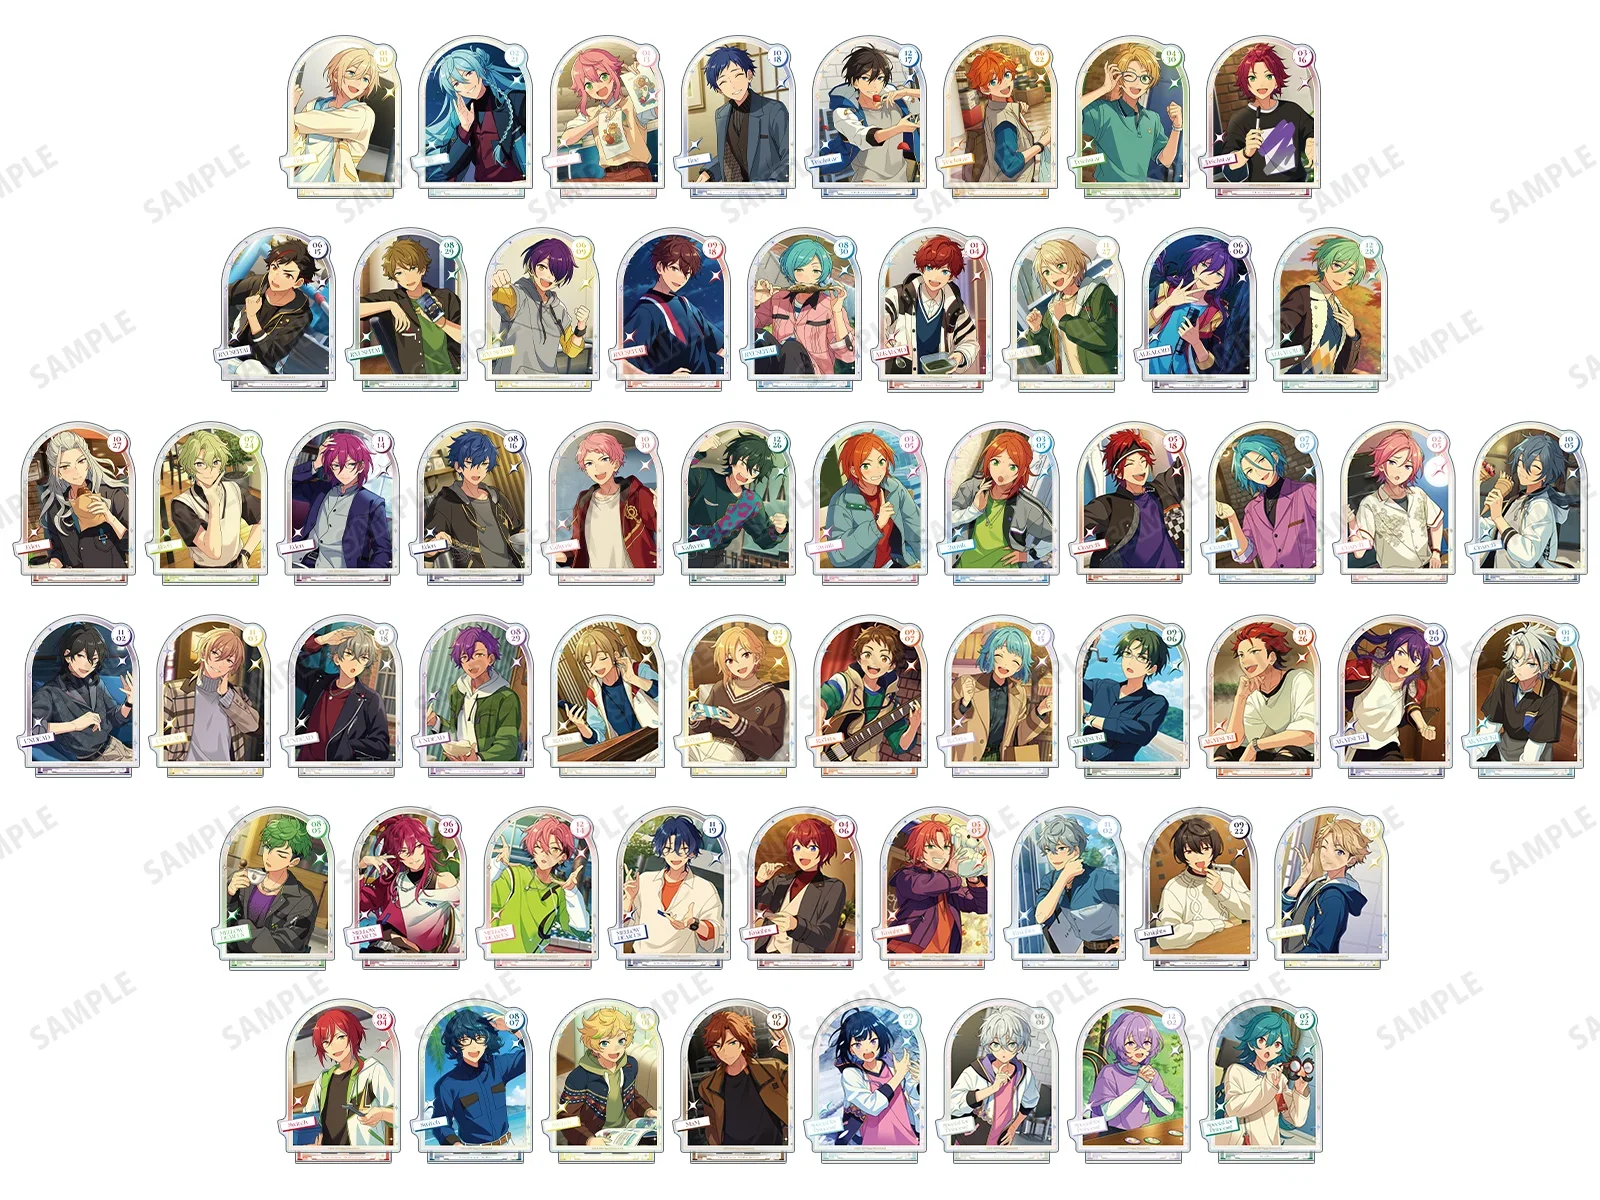
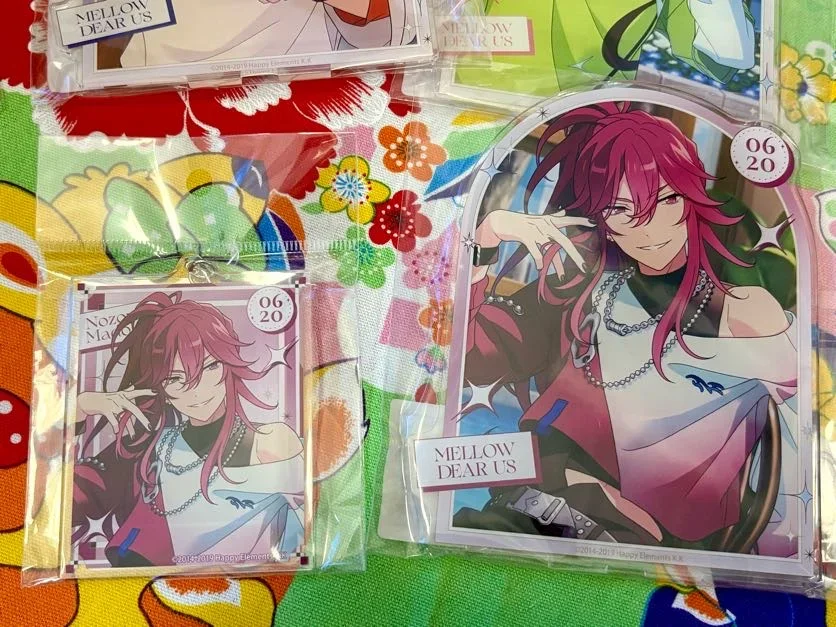
- BIG Acrylic Stand
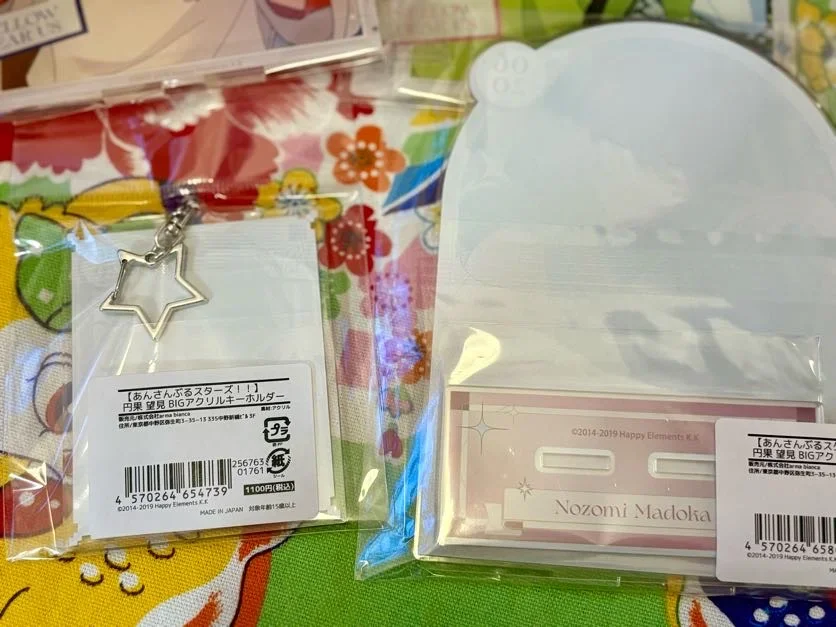
- BIG Acrylic Keychain
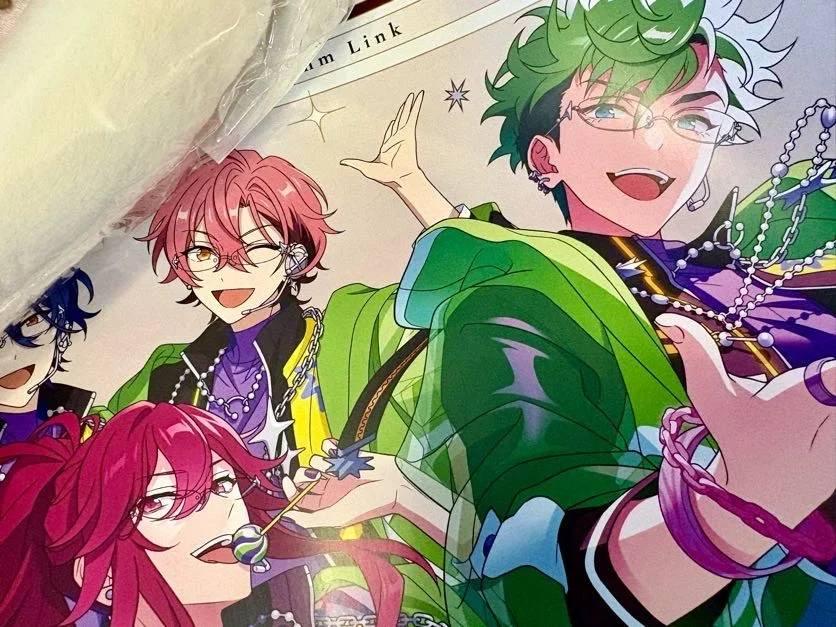
- A3 Matte Poster
- B8 Hard Card Case
That is the entire lineup. And that is exactly what I bought. Because I have every single type right here in my hands, let’s calmly review them one by one.
【Foil-Stamped Card Collection】
"Foil-stamped" and "card." I don't know a single otaku who can hear those words and just pass it by. It’s a classic staple where the gambling element of "random blind pulls" releases pure dopamine. The fact that every single card features foil stamping makes it an undeniable "must-buy."
...However, let's take a step back and look at this objectively.
Enstars has an absolute reigning champion of merch known as Pashattsu (snapshot-style cards). A standard pack of Pashattsu gives you a set of 3 for 275 yen (roughly 90 yen per card). In contrast, these are 385 yen for a single card.
Size-wise, they are one size smaller than Pashattsu, fitting perfectly into the standard Instax (Cheki) sleeves you can get at Seria. The surface is smooth and glossy, and above all, the foil stamping is genuinely beautiful.
It’s a wonderful product, but looking at it honestly just made me reaffirm one absolute truth: considering the official Pashattsu offers almost the exact same texture with foil-stamped signatures at such a ridiculously low price, "Pashattsu's pricing is actually insane."
【Mini Shikishi Collection】
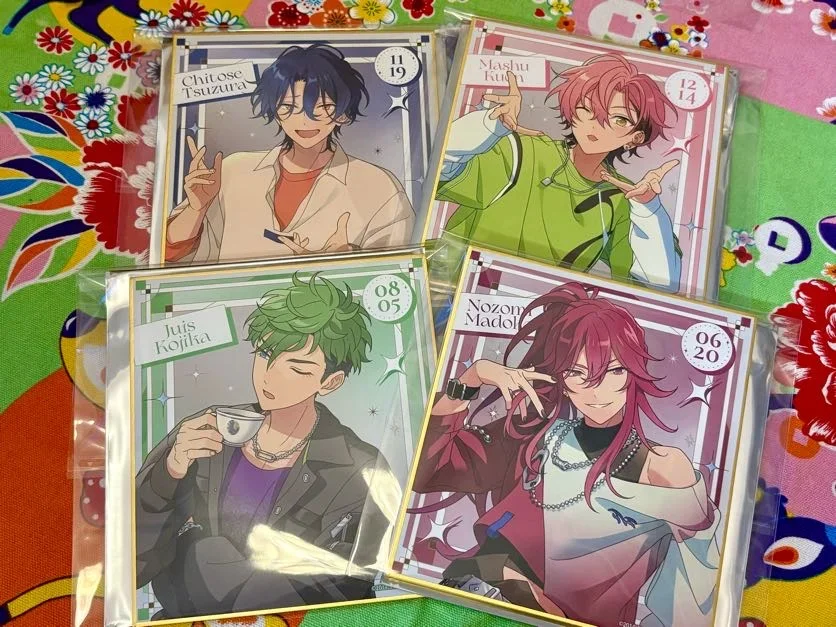
"What on earth are we actually supposed to use shikishi for?" I ask myself this exact question every single time... and yet, I bought them again. However, otaku are simply creatures who will be completely satisfied by the simple fact that the artwork is printed in a large size.
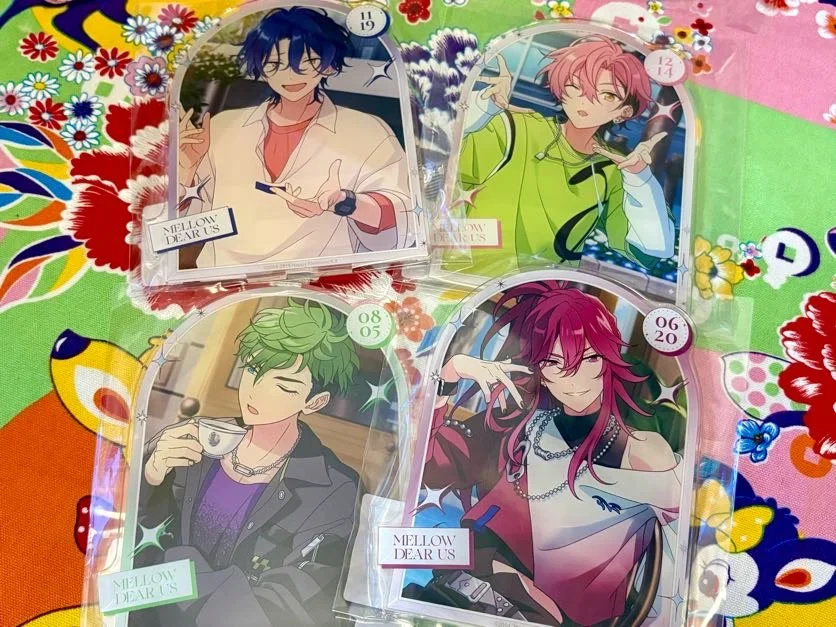
【BIG Acrylic Stand】
Well, acrylic stands are basically a default purchase, right? However, my honest reaction was... "Did it really have to be BIG...?"
I feel like Enstars rarely gives us full-body acrylic stands, and true to form, this one also features a large, semi-circular design. But then I noticed something: the overall size is almost identical to the Mini Shikishi.
In other words, when it comes to the "illustration you get to enjoy" and the "physical size," the mini shikishi and the acrylic stand completely overlap with each other.
However, if your plan involves taking them out to cafes for photoshoots or building an elaborate birthday shrine for your oshi, the self-standing acrylic stand easily takes the win.
After all, the acrylic stand is undeniably one of the Three Sacred Treasures of an otaku. ...Which only makes that lingering question rear its head once again: "Seriously, what are shikishi actually for?"
【BIG Acrylic Keychain】
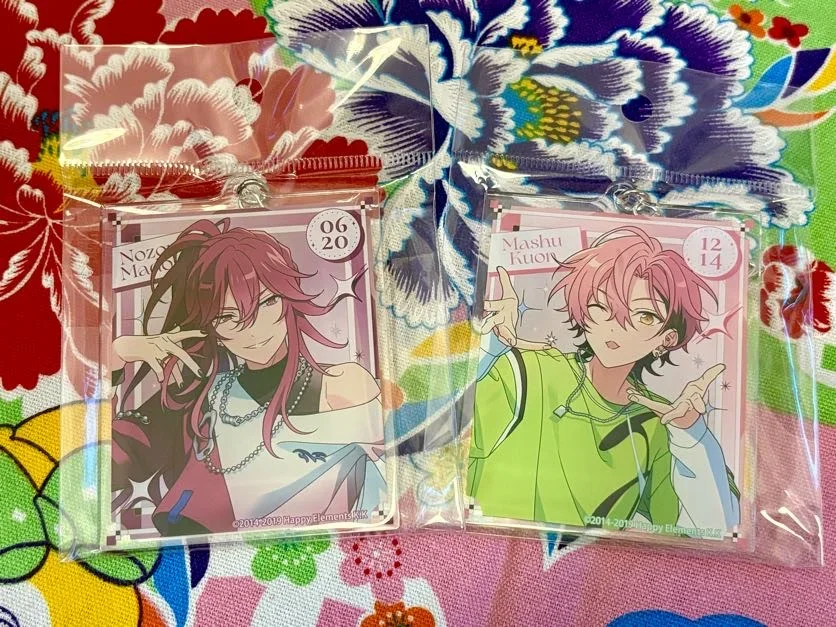
We just can't seem to get away from the word "BIG." Size-wise, I'd say it's roughly about the same size as a standard bonus coaster. If it happens to feature your absolute favorite artwork, it’s perfect for attaching to your bag to make a bold statement.
【A3 Matte Poster】
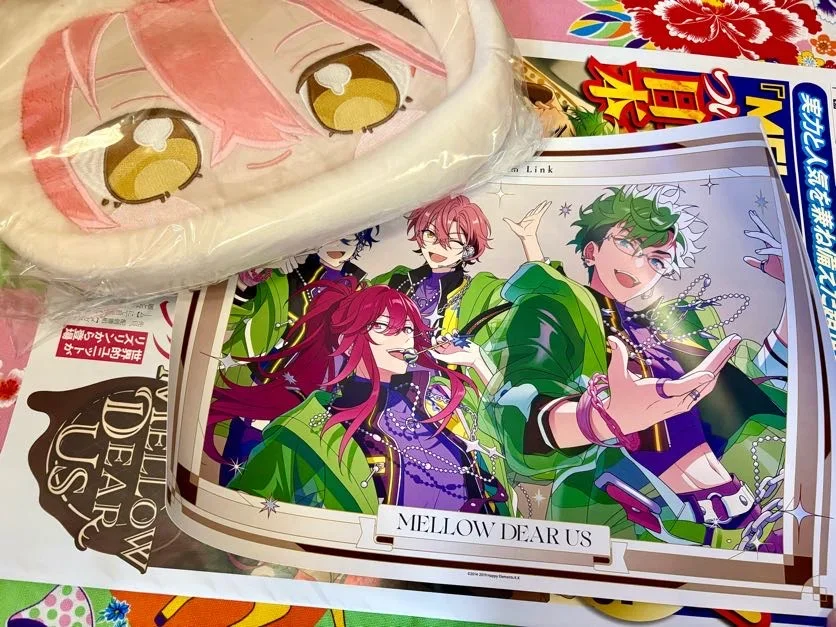
The packaging on this was god-tier; it was securely sealed inside a sturdy cardboard tube box. I was genuinely moved that they packaged it so securely for just 880 yen.
However, even after looking at the actual product, it remains a complete mystery what exactly makes it "matte." It had almost the exact same texture as the regular Office Posters sold at the ES Store.
However, since the artwork itself is different, if you're someone who absolutely needs to hang this specific illustration on your wall, I'd say it's still worth picking up.
Just a heads-up, though: it really is just paper and has a stubborn curl to it (from being rolled in the tube). This means you'll need to put it in a proper frame or pin it down firmly to display it, which does raise the hurdle just a little bit.
【B8 Hard Card Case】
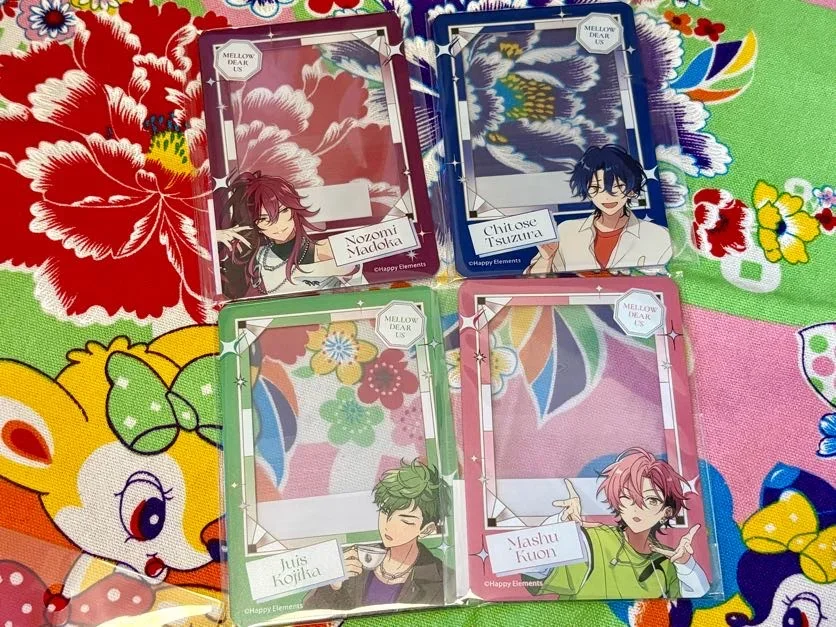
It’s probably no exaggeration to call this the most popular item of this entire release. Since it was open (non-blind) merch, it seems many characters sold out completely during the very early hours of the first day. Hard cases like this have rapidly skyrocketed in popularity as merch recently.
First of all, they don't take up much space. Plus, they're relatively cheap. Because they are sturdy and wonderfully compact, they are absolutely perfect for bringing along on little outings, like taking your oshi to a cafe (oshi-katsu).
Now then. After buying absolutely everything and lining them all up together, I suddenly realized something.
"...Wait, aren't these almost all the exact same illustration...?"
That's right. In a completely too-late realization—and as is tradition at this point—I had been frantically collecting "flat boards of different materials and sizes featuring the exact same artwork."
The "Let's Get Rational" Tier List
Now that we’ve realized these are all exactly the same illustration, let's put aside the "I must buy it all because it's my oshi" mentality and actually be rational about this.
For this review, I ranked the items based on three incredibly strict criteria. (Note: Since these are pre-bloomed 4-Star illustrations where background details aren't really a huge factor, I deliberately excluded criteria like "composition" or "how well the merch utilizes the artwork.")
【Evaluation Criteria】
- Portability & Photogenic Quality for *Oshi-katsu* (How easy is it to handle on a small cafe table, etc.?)
- Irreplaceability (Can it be easily substituted by cheaper merch already on the market?)
- Storage & Space-Saving (Will it lower an otaku's QOL [Quality of Life]?)
Evaluating all the items entirely objectively against these criteria, I’ll just give you the conclusion right now: Unless you are a hardcore collector, you will be perfectly satisfied just buying the "B8 Hard Card Case" and the "Foil-Stamped Card Collection."
Here is the reasoning behind each ranking.
Tier S: Buy This and Your Oshi-katsu is Complete (Highest Recommendation)
【B8 Hard Card Case | Price (Tax Incl.): 660 yen (Open/Non-Blind)】
- Portability & Photogenic Quality: ◎+ (Outstanding)
- Irreplaceability: 〇 (Good)
- Storage & Space-Saving: ◎ (Excellent)
This is probably the MVP and most popular item of this entire release. It sits on roughly the same level as the Card Collection, but because the case itself is rigid, its protection level inside a bag and its overall portability surpass standard cards.
Some might argue that the printed illustration itself is a bit small, but this product possesses the ultimate expansion feature: "putting your existing Pashattsu inside it for photoshoots."
While the Foil-Stamped Cards from this collab are slightly smaller than a Pashattsu, this card case is sized perfectly to fit a standard Pashattsu inside. It functions perfectly on its own, and it lets you "dress up" the cards you already own. As a practical everyday item for oshi-katsu, it simply has absolutely no weaknesses.
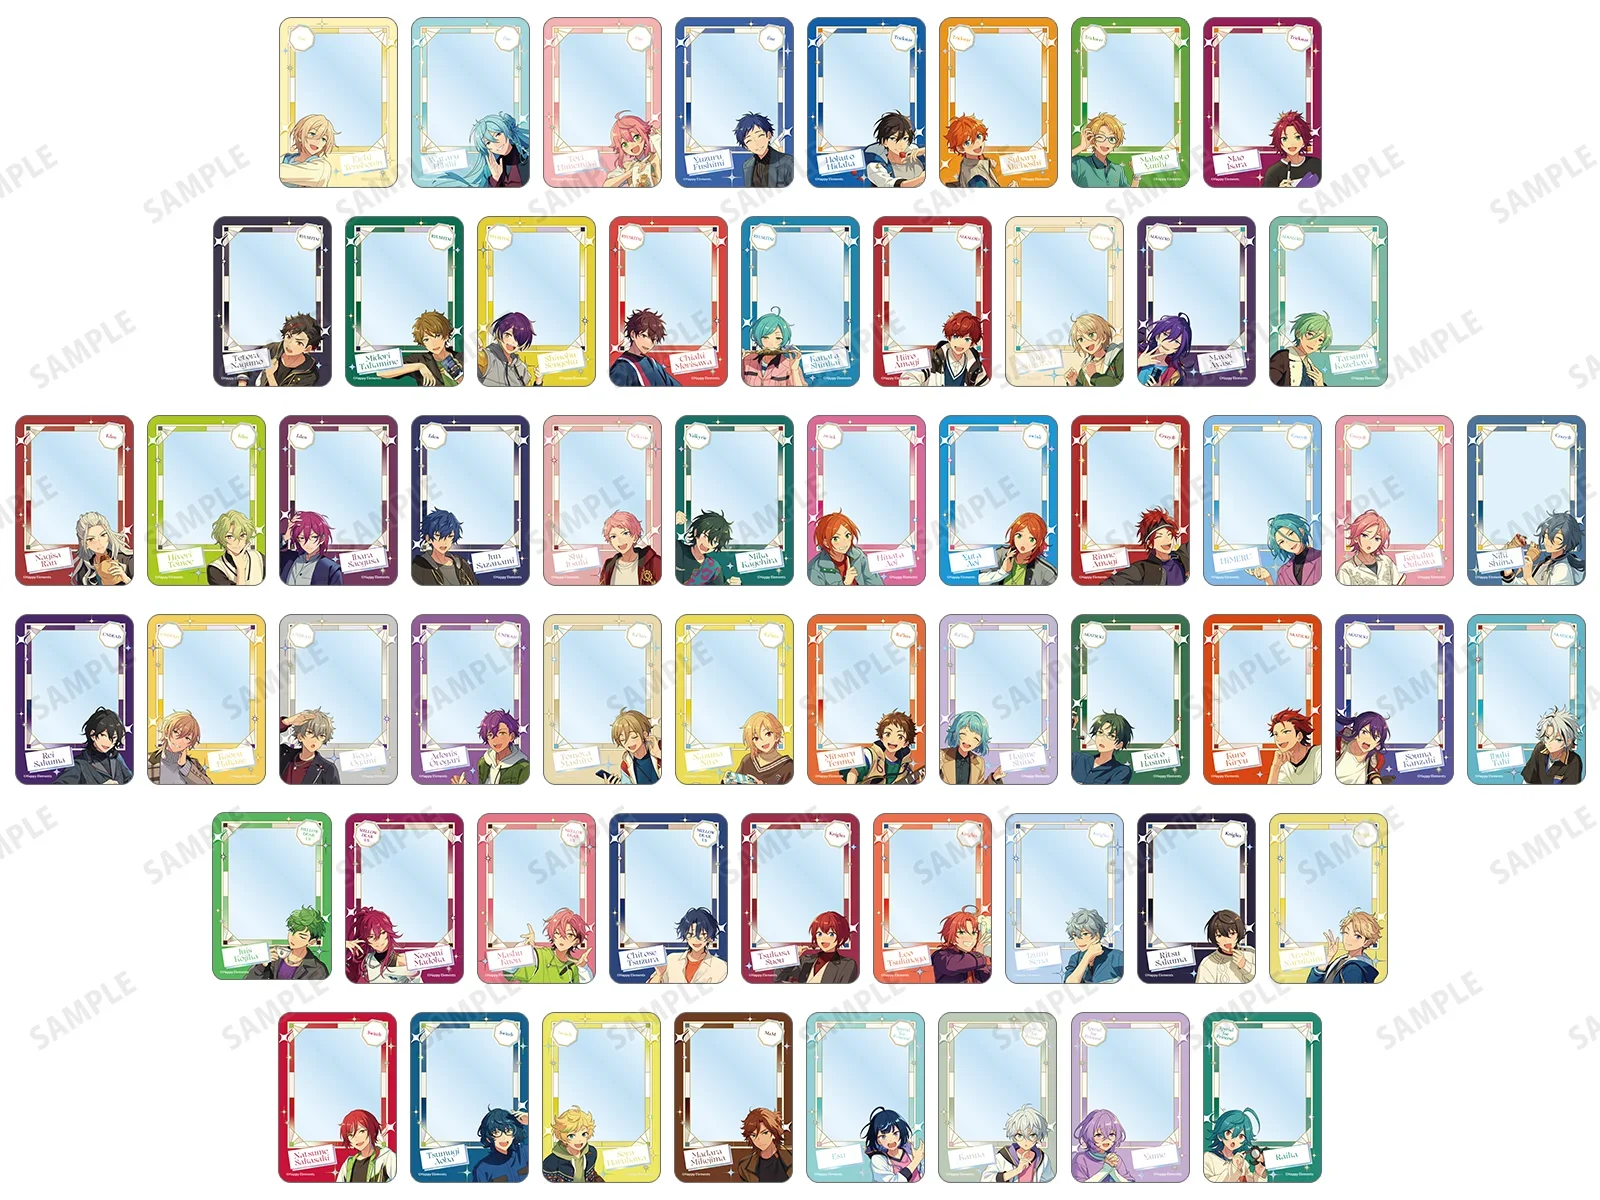
【Foil-Stamped Card Collection | Price (Tax Incl.): 385 yen (Random/Blind)】
- Portability & Photogenic Quality: ◎ (Excellent)
- Irreplaceability: △ (Fair)
- Storage & Space-Saving: ◎ (Excellent)
It’s an ultimate utility item where simply holding it up in front of a cafe table or a life-sized panel instantly completes your "oshi-katsu photo." Plus, since the character's birthday is incorporated into the design, it comes in incredibly handy as a decorative piece for your birthday shrine.
However, because the artwork itself has already been released on items like Pashattsu, its irreplaceability earns a △. Even so, considering its incredible versatility and space-saving nature, it solidly remains a Tier S item that you definitely won't regret buying. Furthermore, because every single card features foil stamping, it possesses a gorgeous flair that standard (normal) Pashattsu just don't have.
Tier A: Buy If You Have a Clear Purpose (Requires Consideration)
【BIG Acrylic Stand | Price (Tax Incl.): 1,980 yen (Open/Non-Blind)】
- Portability & Photogenic Quality: 〇 (Good)
- Irreplaceability: △ (Fair)
- Storage & Space-Saving: △ (Fair)
It possesses almost the exact same size and role as the Mini Shikishi and the Keychain, but this one takes the win by a narrow margin. The reason? Because it stands on its own. When you want to take pictures with it at a cafe or line it up on your birthday shrine, it boasts much higher mobility since you don't need to fiddle with a separate easel or display stand. This is strictly for people with the clear, unwavering intention of: "I absolutely love this artwork and I want to look at it on the largest flat board possible."
Tier B: Non-Collectors, Please Take a Breath First
【Mini Shikishi Collection | Price (Tax Incl.): 660 yen (Random/Blind)】
You will need a separate display stand or easel just to prop it up, and it's fairly bulky to carry around if you want to bring it out for oshi-katsu. If an acrylic stand featuring "the exact same illustration in almost the exact same size" exists alongside it, the justification for choosing this one is a bit weak simply because it can't stand on its own.
【BIG Acrylic Keychain | Price (Tax Incl.): 1,100 yen (Open/Non-Blind)】
Size-wise, it's a bit smaller than the Shikishi and the Acrylic Stand. Unless you have a strong, specific purpose like, "I absolutely love this artwork and want to show it off on my bag," the priority for this one drops.
There is a popular oshi-katsu photography technique where you hang a keychain on the straw of your cafe drink. However, if you try that with this one, depending on the cup, the sheer weight of it might actually cause your drink to tip over.
【A3 Matte Poster | Price (Tax Incl.): 880 yen (Open/Non-Blind)】
I get the feeling this is strictly a collector-oriented item. Unless you already have dedicated wall space in your room and a fully established know-how for displaying posters, this is definitely an item that requires taking a deep breath before purchasing.
The official Office Posters from the ES Store also offer a massive variety of illustrations, so it might be worth checking those out instead.
Conclusion
And there you have it—the very first entry in my new category: The "Take a Breath" Merch Tier List.
As for myself, I am completely unable to escape the curse of being a collector, which is why I ended up buying absolutely everything anyway... (lol). But for all my fellow Producers out there who are on the fence about what to buy, I would be thrilled if this provided you with a reference point to help you cool your head and make a calm decision.
While this evaluation is entirely based on my own personal bias, I’d like to see how this goes and hopefully continue conducting these "practical tests for a smarter oshi-katsu (?)" with all sorts of different merch in the future.
Thank you so much for reading all the way to the end!